Section 02 Version control with Git
“The whole idea behind any version control system is to store “safe” copies of a project so that you never have to worry about irreparably breaking your code base.” - Bitbucket.org
The notes below are modified from the excellent Version Control with Git freely available on the Software Carpentry website.
Version Control

Version control systems start with a base version of the document and then record changes you make each step of the way. You can think of it as a recording of your progress: you can rewind to start at the base document and playback each change you made, eventually arriving at your more recent version.
Once you think of changes as separate from the document itself, you can then think about “playing back” different sets of changes on the base document, ultimately resulting in different versions of that document. For example, two users can make independent sets of changes on the same document:
Unless multiple users make changes to the same section of the document - a conflict - you can incorporate two sets of changes into the same base document.
A version control system is a tool that keeps track of these changes for us, effectively creating different versions of our files. It allows us to decide which changes will be made to the next version (each record of these changes is called a commit), and keeps useful metadata about them. The complete history of commits for a particular project and their metadata make up a repository. Repositories can be kept in sync across different computers, facilitating collaboration among different people.
Git

What is Git?
Git is the most commonly used version control system in the world today and is considered the modern standard for software development.
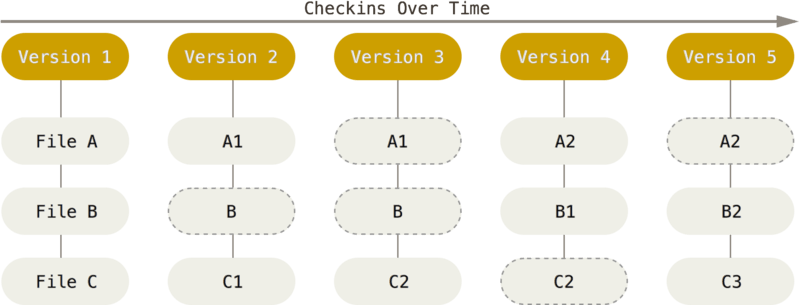
Git thinks of its data more like a series of snapshots of a filesystem. With Git, every time you commit, or save the state of your project, Git basically takes a picture of what all your files look like at that moment and stores a reference to that snapshot. To be efficient, if files have not changed, Git doesn’t store the file again, just a link to the previous identical file it has already stored. Git thinks about its data more like a stream of snapshots. This makes Git more like a mini filesystem with some incredibly powerful tools built on top of it. (Source: Getting Started - What is Git?)

Git tracks the changes you make to files, so you have a record of what has been done, and you can revert to specific versions should you ever need to. Git also makes collaboration easier, allowing changes by multiple people to all be merged into one source. So regardless of whether you write code that only you will see, or work as part of a team, Git will be useful for you. (Source: What Is Git & Why Should You Use It?)
Git is a software that runs locally. Your files and their history are stored on your computer. You can also use online hosts/platforms (such as GitHub, Gitlab, or Bitbucket) to store a copy of the files and their revision history. Having a centrally located place where you can upload your changes, and download changes from others, enable you to collaborate more easily with other developers. Git can automatically merge the changes, so two people can even work on different parts of the same file and later merge those changes without losing each other’s work.
Why is Git Useful?
- A backup of your files (repository)
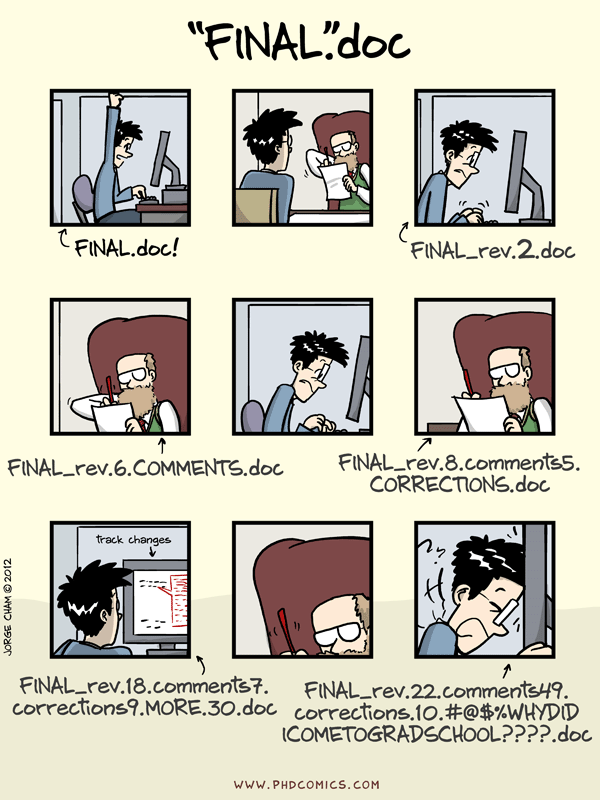
- Cleaner file system - no more “code, codev2, codev3_test, codev3_test1” directories
- Record of your edits thought process
- Check for bugs in inconsistent results
- Unlimited and powerful “undo”
- Collaboration
The Three States
Git has three main states that your files can reside in: modified, staged, and committed:
Modified means that you have changed the file but have not committed it to your database yet.
Staged means that you have marked a modified file in its current version to go into your next commit snapshot.
Committed means that the data is safely stored in your local database.
This leads us to the three main sections of a Git project: the working directory, the staging area, and the Git directory.

The working directory is a local copy of one version of the project. These files are pulled out of the compressed database in the Git directory and placed on disk for you to use or modify.
The staging area is a file, generally contained in your Git directory, that stores information about what will go into your next commit.
The Git directory is where Git stores the metadata and object database for your project. This is the most important part of Git, and it is what is copied when you clone a repository from another computer.
Basic Git Workflow
The basic Git workflow goes something like this:
You modify files in your working directory.
You selectively stage just those changes you want to be part of your next commit, which adds only those changes to the staging area.
You do a commit, which takes the files as they are in the staging area and stores that snapshot permanently to your Git directory.
Glossary
Commit:
To record the current state of a set of files (a changeset) in a version
control repository. As a noun, the result of committing, i.e. a recorded
changeset in a repository. If a commit contains changes to multiple
files, all of the changes are recorded together.
Master:
The default development branch. Whenever you create a Git repository, a
branch named “master” is created, and becomes the active branch. In most
cases, this contains the local development, though that is purely by
convention and is not required.
Merge:
(a repository): To reconcile two sets of changes to a repository.
Origin:
The default upstream repository. Most projects have at least one
upstream project which they track. By default, origin is used for that
purpose.
Pull:
Pulling a branch means to fetch it and merge it.
Push:
Pushing a branch means to get the branch’s head from a remote
repository, find out if it is an ancestor to the branch’s local head
ref, and in that case, putting all objects, which are reachable from the
local head ref, and which are missing from the remote repository, into
the remote object database, and updating the remote head ref. If the
remote head is not an ancestor to the local head, the push fails.
Remote:
(of a repository) A version control repository connected to another, in
such way that both can be kept in sync exchanging commits.
Repository:
A storage area where a version control system stores the full history of
commits of a project and information about who changed what, when.
Resolve:
To eliminate the conflicts between two or more incompatible changes to a
file or set of files being managed by a version control system.
Timestamp:
A record of when a particular event occurred.
Version control:
A tool for managing changes to a set of files. Each set of changes
creates a new commit of the files; the version control system allows
users to recover old commits reliably, and helps manage conflicting
changes made by different users.
See more about Git Glossary at the Git website.
Using GitKraken
Follow the instructor to do the following:
Interface
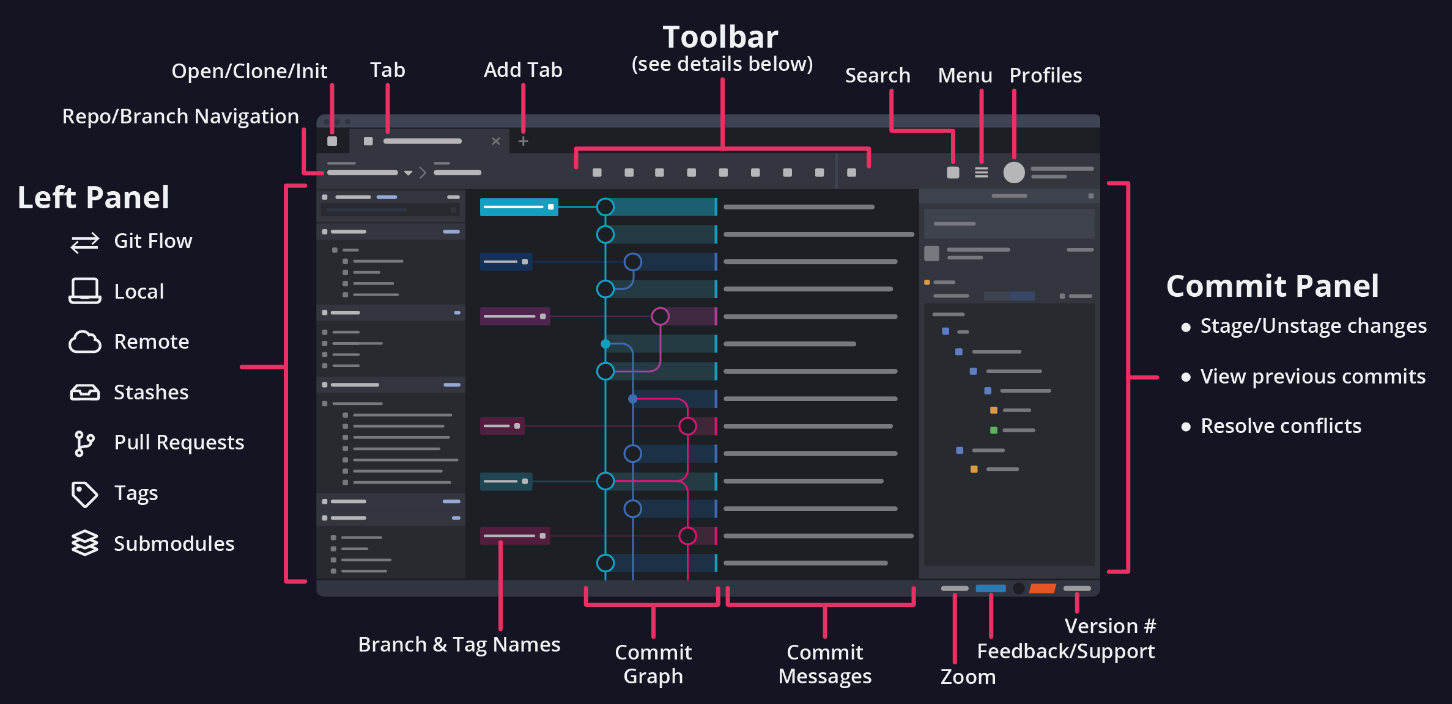
Navigate yourself with the Interface.

Initialize a new repository
New Tab -> Create ->
Local Only
Staging a change
- Modify the
READMEfile - Staging adds selected file contents to the index, which is like
flagging your work as good to go. To start, select the
//WIPnode to see all your files on the Commit Panel.WIPstands for work in progress. - Once the
//WIPnode is selected, aStage Filetab will appear when you hover over a file in the Commit Panel. - You may also click on a file for review in the diff or click the
Stage all changes.
Unstaging
Unstage files by selecting a staged file and hitting the button that appears.
Commit a change
After Staging the change, write a short summary of the change. Good commit messages start with a brief (<50 characters) statement about the changes made in the commit. Generally, the message should complete the sentence “If applied, this commit will”. If you want to go into more detail, add a blank line between the summary line and your additional notes. Use this additional space to explain why you made changes and/or what their impact will be.
Then click Commit Changes to 1 File. Immediately, you
will see a summary of the commit.
The above steps can be viewed as:
Add a file to the repository
Now add a new file into the repository. Stage this change, and commit it.
Check the Activity Logs
Pop open the hood of your project and check out the
Activity Logs located in the footer toolbar of GitKraken.
Activity Logs provide real-time feedback of application and
repository-level interactions that occurred in GitKraken.
Activity Logs files are plain text in a standard log file
format. Each line displays the time of action, action feedback, and
performance data measured in milliseconds.
Integration with GitHub
Now your repository is merely local. We need to integrate it with
GitHub to make a remote repository.
- Click
Push, you will get a messageThere are no remotes to push to, would you like to add one?. SelectYes. - Provide your GitHub information and integrate it.
- Finally, click
Create remote and push local refs
Browse GitHub
Log in GitHub, you should see a new repository which is excatlly the same as your local one.
Upload a new file via GitHub
Upload a new file via GitHub, and commit the change. Check what happens with your GitKraken.
Pull a repository
In GitKraken, you will find the remote is ahead of the
local repository. Click Pull to get the latest changes.
Pull the remote to main. Check your local
folder.
Delete your local repository
Now close GitKraken, and delete the local repository. What happens to
the remote?
Clone a remote repository
New Tab -> Clone. Provide the URL of the
remote, then click Clone the repo!. Or select
the remote repository under the Github.com tab, then click
Clone the repo!. By doing so, your repository will go back
soon.
Other important usages
For now, we only cover the basic usage of Git. In fact, there are
other important usages of Git, like branch,
merge, conflict, and
pull request. Go to GitKraken
Guide for more.
Git is a also powerful command-line tool. Check Version Control with Git for more.
In-class exercises
Exercise #1
Imagine you drafted an excellent paragraph for a paper you are writing, but later ruin it. How would you retrieve the excellent version of your conclusion? Is it even possible?
Exercise #2
Create a local repository
NewRepoWrite some sentences in the
README, describing the purpose of this repository.Add a text file to this folder, stage and then commit your change.
Modify the above text file by adding and deleting a few lines, stage and then commit your change.
Add another file (e.g., in
.csvor.pdfformat) to the folder, stage and then commit your change.Add two files at the same time to the folder, stage and then commit your changes.
Now
pushthe local repository to GitHub. Check your filesystem on GitHub.Upload another file via GitHub, commit the change.
Edit your text file online by clicking the file, then
Edit this file, commit the change.Now
pulltheremoterepository to update your local repository.Take a look at the Activity Logs. Do the logs record your commands?
Now close GitKraken, and delete your local folder.
Reopen GitKraken,
clonetheNewReporepository from GitHub.
Exercise #3
Create a local repository
ESE5023_Assignments_XXX, whereXXXis your SUSTech ID.Push it to GitHub as a
remoterepository. This is the place you are going to turn in your assignments, e.g.,PS1/PS1_1.py,PS1/PS1_2.py,PS3/PS3_3.py,…Go to GitHub, click
ESE5023_Assignments_XXXrepository, thenSettings. Under theCollaboratorssub-page, then inManage accessbox, clickAdd people, add inviteyerg2023@mail.sustech.edu.cn,beihuihu@163.comand then13530777967@163.comas collaborators. By doing so, your TAs will be able to get access to your GitHubESE5023_Assignments_XXXrepository, and they will grade your assignments and provide necessary feedback in the future.